One of the crepe myrtles today:
The crepe myrtles are looking good this year. They are starting to grow. In a couple of years they
might be looking like a row of trees, rather than shrubs.
Progress on reducing my stash in January:
Quilt fabric minus 1.3m
Dress fabric minus 4m
Thread:
Three spools emptied!
Thursday, January 31, 2019
Wednesday, January 30, 2019
A Bit of Rain
It has been very dry lately, so it was a bit exciting today when this happened:
Lal Lal is under that red patch of rain on the left between Ballarat and Meredith. The storm looked promising, but by the time I had persuaded my camera not to focus on the window:
The rain was finished. We did get 1mm, which was better than nothing, but it would be nice for the garden to get some proper rain.
Lal Lal is under that red patch of rain on the left between Ballarat and Meredith. The storm looked promising, but by the time I had persuaded my camera not to focus on the window:
The rain was finished. We did get 1mm, which was better than nothing, but it would be nice for the garden to get some proper rain.
Tuesday, January 29, 2019
Deja Vu
No, this is not the same tunic as yesterday:
This is my second finish for the year. Tunic made with the rest of yesterday's fabric. This one is a little shorter, and has narrow cuffs on the sleeves instead of ruffles. Two new items in the wardrobe, 4 metres of fabric out of the sewing room.
Monday, January 28, 2019
Tunic Top
My first finish of the year:
StyleArc "Culliver" tunic.
Using up some fabric I bought in India, which means I have owned it for more than 10 years. The fabric was sold as a set for making a salwar kameez. The cream fabric is for the top (kameez), and the dark green for the trousers (salwar). There is also a matching dark green dupatta (scarf or shawl) which is a much lighter fabric. I could have made the whole top out of just the cream fabric, but I wanted some contrast. There is enough fabric left to make another version in the opposite colours, with a bit of creative fabric joining.
StyleArc "Culliver" tunic.
Using up some fabric I bought in India, which means I have owned it for more than 10 years. The fabric was sold as a set for making a salwar kameez. The cream fabric is for the top (kameez), and the dark green for the trousers (salwar). There is also a matching dark green dupatta (scarf or shawl) which is a much lighter fabric. I could have made the whole top out of just the cream fabric, but I wanted some contrast. There is enough fabric left to make another version in the opposite colours, with a bit of creative fabric joining.
Sunday, January 27, 2019
A Walk in the Cemetery
It may sound morbid, but I quite enjoy walking in cemeteries. They are usually very peaceful, and sometimes quite beautiful.
Roses and greenery in one section of the Ballarat Cemetery:
Moon gate entrance to the Chinese section:
Chinese graves:
The inscriptions are all on the side facing east (which was in deep shadow this afternoon), but I don't know if the stones mark the head or the foot of the graves.
I'm sure many Australian children have had nightmares about banksia men after reading May Gibbs' stories. This tree has a good crop of potential banksia men:
Roses and greenery in one section of the Ballarat Cemetery:
Moon gate entrance to the Chinese section:
Chinese graves:
The inscriptions are all on the side facing east (which was in deep shadow this afternoon), but I don't know if the stones mark the head or the foot of the graves.
I'm sure many Australian children have had nightmares about banksia men after reading May Gibbs' stories. This tree has a good crop of potential banksia men:
Sunday, January 20, 2019
Wind Farm
Two weeks ago we went to look at progress on the Lal Lal wind farm (which is not actually in Lal Lal, but a few kms on either side of us). This is what we could see on the 5th of January:
A few towers beginning to grow, and on the ground beside each of them, three enormous blades.
Who knew the blades have serrated edges?
While out driving yesterday afternoon I saw that one of the towers has now got to this point:
Sorry about the terrible photo. I did not have my camera with me, so had to zoom in with my phone. I was about 3km away from the tower, to give you some idea of how much zooming I had to do and how big it is.
A few towers beginning to grow, and on the ground beside each of them, three enormous blades.
Who knew the blades have serrated edges?
While out driving yesterday afternoon I saw that one of the towers has now got to this point:
Sorry about the terrible photo. I did not have my camera with me, so had to zoom in with my phone. I was about 3km away from the tower, to give you some idea of how much zooming I had to do and how big it is.
Saturday, January 19, 2019
Bloom Block One
I am participating in the 2019 Bloom Stitch-Along with Cheryll at Gone Stitchin'. My quilt will be "inspired by Bloom" as I am not using the correct templates.
This is the story of my first block.
Lori Holt's appliqué method for this quilt involves backing each piece with sew-in interfacing. I haven't tried this before, but I have a big roll of interfacing helping to clutter up my sewing room, so let's give it a go!
I drew the shapes on the interfacing then stitched along the lines. I found that the lines were hard to see because of the shadow of the presser foot, so I missed the line in a few places. However an LED lighting strip arrived from China on Tuesday, which should help with the next blocks.
I didn't sew across the narrow end of these petal shapes, as that end will be hidden under the centre of the flower. It also made it easier to turn the shapes right-way out. I trimmed away a lot of the seam allowance at those points, but still had trouble making them nice pointy points. I also had difficulty turning out the leaf shapes. As a result I have ordered a skinny Clover point turner, which I hope will arrive before I tackle block two.
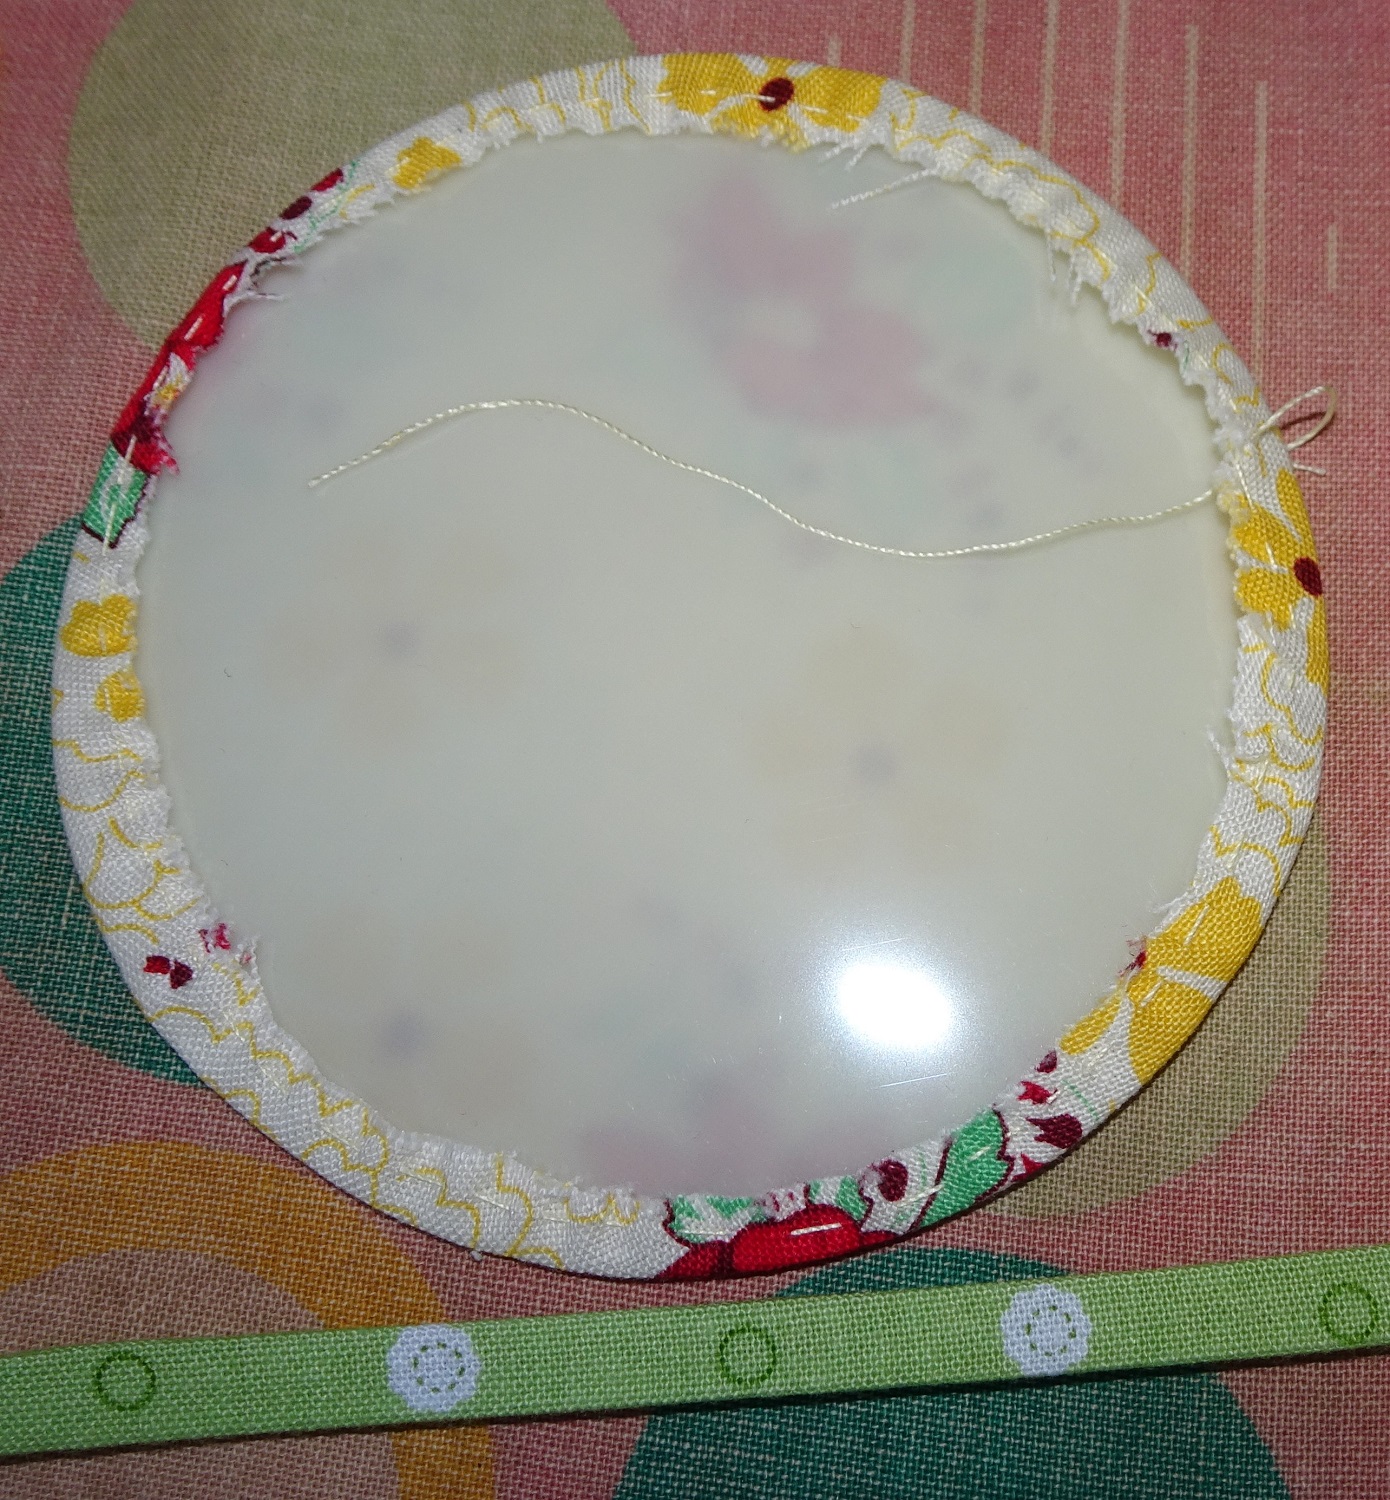
For the centre of the flower I used one of Karen Kay Buckley's "Perfect Circles" templates:
The advantage of the "perfect circles" is that they are made of mylar, not plastic, so you can iron over them. The strip at the bottom of the picture is my stem, made with a 6mm bias tape maker.
Then I had a slight difficulty. I planned to hold the pieces in place with dots of Roxanne's Glue-Baste-It, but the top was glued firmly on and I couldn't budge it. Instead I used a glue pen, but some pieces, particularly the stem, shifted as I sewed:
Stitched down with a machined blanket-stitch. I wasn't at all happy with my stitching, particularly on the stem. I also realised round about now that using a fabric with straight lines for the petals had not been a good idea, as it emphasised the wonkiness of the shape and of my stitching. But I'd come this far so I continued:
Now I had more things I was unhappy about! Because the fabric in the centre is quite light, the long pieces of petal underneath it are quite visible. Not in the photo so much, but in real life they are. If I had used the interfacing method the extra layer might have helped disguise them. The other thing I don't like is the big gap between the lower petals. The flower in the pattern does not look like that.
Eventually I decided that this was my practice piece, and I made it again. In the intervening hours a friend told me that the Roxanne's glue nozzle can be freed up by giving it a soak in warm water. Hooray! That worked beautifully, so for my second attempt the stem was attached more firmly and didn't move:
Changes I made: The petal shapes didn't need to be as long as they were, as a lot was hidden behind the flower centre. I drew them shorter this time. I also used a less transparent fabric for the flower centre, which helped hide the ends of the petals. I spread the petals more, although probably could have spread them a little further.
I haven't yet added the sashing to the block, as I am still considering my options for that.
Anyway, it has been a learning experience. By the time I get to the 20th block of this quilt, I hope there will be visible improvement.
See the other participants at Cheryll's Bloom Sew-Along link-up!
This is the story of my first block.
Lori Holt's appliqué method for this quilt involves backing each piece with sew-in interfacing. I haven't tried this before, but I have a big roll of interfacing helping to clutter up my sewing room, so let's give it a go!
I drew the shapes on the interfacing then stitched along the lines. I found that the lines were hard to see because of the shadow of the presser foot, so I missed the line in a few places. However an LED lighting strip arrived from China on Tuesday, which should help with the next blocks.
I didn't sew across the narrow end of these petal shapes, as that end will be hidden under the centre of the flower. It also made it easier to turn the shapes right-way out. I trimmed away a lot of the seam allowance at those points, but still had trouble making them nice pointy points. I also had difficulty turning out the leaf shapes. As a result I have ordered a skinny Clover point turner, which I hope will arrive before I tackle block two.
For the centre of the flower I used one of Karen Kay Buckley's "Perfect Circles" templates:
The advantage of the "perfect circles" is that they are made of mylar, not plastic, so you can iron over them. The strip at the bottom of the picture is my stem, made with a 6mm bias tape maker.
Then I had a slight difficulty. I planned to hold the pieces in place with dots of Roxanne's Glue-Baste-It, but the top was glued firmly on and I couldn't budge it. Instead I used a glue pen, but some pieces, particularly the stem, shifted as I sewed:
Stitched down with a machined blanket-stitch. I wasn't at all happy with my stitching, particularly on the stem. I also realised round about now that using a fabric with straight lines for the petals had not been a good idea, as it emphasised the wonkiness of the shape and of my stitching. But I'd come this far so I continued:
Now I had more things I was unhappy about! Because the fabric in the centre is quite light, the long pieces of petal underneath it are quite visible. Not in the photo so much, but in real life they are. If I had used the interfacing method the extra layer might have helped disguise them. The other thing I don't like is the big gap between the lower petals. The flower in the pattern does not look like that.
Eventually I decided that this was my practice piece, and I made it again. In the intervening hours a friend told me that the Roxanne's glue nozzle can be freed up by giving it a soak in warm water. Hooray! That worked beautifully, so for my second attempt the stem was attached more firmly and didn't move:
Changes I made: The petal shapes didn't need to be as long as they were, as a lot was hidden behind the flower centre. I drew them shorter this time. I also used a less transparent fabric for the flower centre, which helped hide the ends of the petals. I spread the petals more, although probably could have spread them a little further.
I haven't yet added the sashing to the block, as I am still considering my options for that.
Anyway, it has been a learning experience. By the time I get to the 20th block of this quilt, I hope there will be visible improvement.
See the other participants at Cheryll's Bloom Sew-Along link-up!
Subscribe to:
Posts (Atom)